


For Product Registration and general enquires please contact us


Yellow Wonder Alpine
$9.99 – $219.99
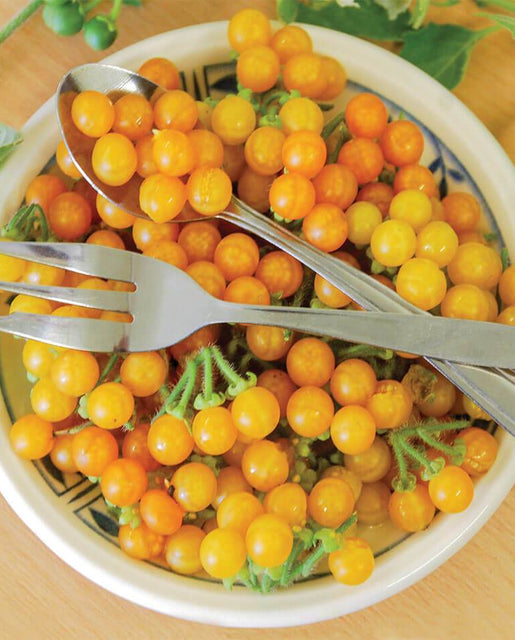
Yellow Wonder has the lovely oblong shape of alpine types, but with yellow skin and flesh and incredible sweetness. The plants are low growing, but very productive, even in containers.
Shipping & Returns
West Coast Seeds ships anywhere in North America. However, we are not able to ship garlic, potatoes, asparagus crowns, bulbs, onion sets, Mason bee cocoons, or nematodes outside of Canada. We regret, we cannot accept returns or damages for orders outside of Canada. The minimum shipping charge to the US is $9.99.
Description
More details about Yellow Wonder Alpine
Fragaria vesca. Yellow Wonder Alpine strawberry seeds are a bit easier to start than some others. Start the seeds indoors as early as December, and transplant outdoors one week after your last average frost date. That’s around the first or second week in April. With this kind of head start, the plants will produce fruit in the first year. Yellow Wonder has the lovely oblong shape of alpine types, but with yellow skin and flesh and incredible sweetness. The plants are low growing, but very productive, even in containers. The seeds can also be sown later in the year, but plan on harvesting berries from the second year of growth forward. Matures in 150 days. (Open-pollinated seeds)-
- Yellow alpine strawberries
- Sweeter than red ones
- Fruit the first year
- Good in containers
- Matures in 150 days
All About Yellow Wonder Alpine
Latin
Fragaria vescaNumerous hybrids exist listed as F. x ananassaFamily: Rosaceae
Difficulty
Moderately easy
Season & Zone
Exposure: Full sun
Zone: Most strawberries are hardy to Zone 5
Timing
Strawberry seeds benefit from vernalization, which is the simulation of winter in order to break dormancy. Start any time in early to late winter. After that time, they will still work, but they may not produce berries during the first season.
Starting
Seal strawberry seed packets in a plastic bag or airtight container and place in the refrigerator for 3-4 weeks. Remove the bag or container from the refrigerator and allow the seeds to reach room temperature over a day or two before breaking the seal. Opening the package too quickly may result in water condensing on the cold seeds, and this will reduce your chances of success. Then, sow the seeds on the surface of pre-moistened, seed starting mix in trays or small containers. Keep the seeded trays under bright fluorescent lights at a constant temperature of 18-24°C (65-75°F). Ensure the seed starting mix stays moist. Germination may take anywhere from 7 to 42 days. Once seeds germinate, increase ventilation to prevent damping off.
Growing
When seedlings have their third true leaf, they can be transplanted into their own pots. Be sure to harden the seedlings off gradually before transplanting outside. Space transplants 60cm (24”) apart in rows 90-120cm (36-48”) apart. Grow strawberries in a well-drained, sandy loam that has been generously dug with organic matter such as finished compost or well-rotted manure. Dig 60mL (1/4 cup) complete organic fertilizer into the soil beneath each transplant. Keep soil moist, but not soggy. A mulch of straw around plants may help prevent the soil from drying out.
Companion Planting
These little plants respond strongly to nearby plants. Couple them with beans, borage, garlic, lettuce, onions, peas, spinach, and thyme. Avoid Brassicas and fennel.


How to Grow Strawberries
Step 1: Timing
Sow indoors in the winter. An earlier start may result in berries the first year. Start any time between December and the beginning of February. After that time, they will still produce plants, but berries may not be produced during the first season. Transplant out at least 3 weeks after last frost. Strawberry seeds will germinate at any time of the year if some simple steps are taken.
Step 2: Starting
Germination is the trickiest aspect to growing strawberries. Be patient, and try the tricks below. Tuck strawberry seed packet inside a sealed plastic bag or airtight container and place in the refrigerator freezer (not deep freeze) for 3-4 weeks. After removing the bag or container, do not break the seal until it (and its living contents) have reached room temperature. This may take several hours. Err on the side of caution. Opening the package too quickly may result in water condensing on the cold seeds, and this will reduce your chances of success. Once the sealed package has “thawed” to room temperature, the seeds are ready to plant. Sow the seeds on the surface of pre-moistened, sterilized seed starting mix in trays or small containers. Place these on a piece of felt or other thick cloth that has its end sitting in water. The idea is to wick up water from below so that the seedling medium stays constantly and evenly damp until germination. An alternative method is to sow strawberry seeds on the surface of moistened soil in a germination tray (or in small pots). Tuck the tray or pots inside a sealed plastic bag, and store in the refrigerator for 3-4 weeks. Move the seeded trays under bright fluorescent lights at a constant temperature of 18-24°C (65-75°F). Seedling heat mats work very well. Germination may take anywhere from 7 days to 6 weeks: Be patient. Once germination occurs, increase ventilation around the plants to prevent damping off. Once the seedlings develop their third true leaf, they can be gently transplanted into their own pots. Be sure to harden strawberry seedlings off carefully and gradually before transplanting outside.
Step 3: Growing
Space transplants 60cm (24″) apart in rows 90-120cm (36-48″) apart. Ever-bearing varieties (such as ours) tend to produce fewer runners, and may produce more fruit if the runners are removed. In the first year of growth, it may be preferable to encourage runners, and let them fill in the spaces between transplants with new offspring plants. Grow strawberries in a well-drained, sandy loam that has been generously dug with organic matter such as finished compost or well-rotted manure. Dig ¼ cup complete organic fertilizer into the soil beneath each transplant. Keep soil moist, but not soggy. A mulch of straw around plants may help prevent the soil from drying out.
Tip!
Companion Planting: These little plants respond strongly to nearby plants. Couple them with beans, borage, garlic, lettuce, onions, peas, spinach, and thyme. Avoid Brassicas and fennel.Additional information
| Matures | in 150 days |
|---|---|
| Exposure | Full sun |
| Quantity | 0.06g, 0.5g, 2.5g, 10g, 50g |
You must be logged in to post a review.


Reviews
There are no reviews yet.