For Product Registration and general enquires please contact us

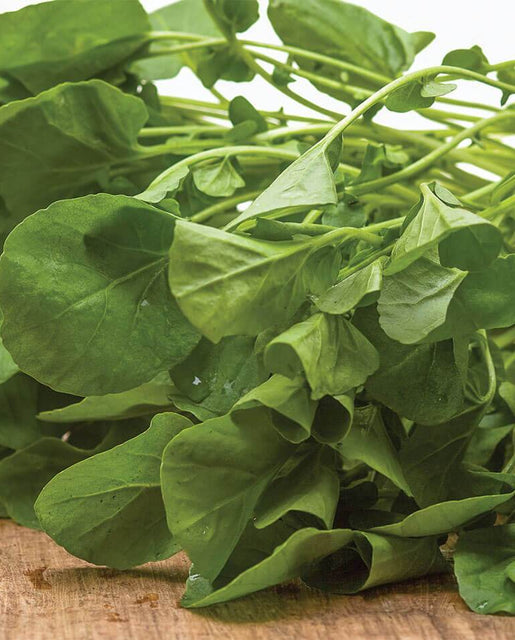
Upland Cress Organic
$7.99 – $679.99
Botanically different from the other cress varieties, this biennial is a bit slower growing and slower to bolt, but very easy once established. It’s a super cold-hardy addition to salads, and blends well with milder greens like chickweed.
West Coast Seeds ships anywhere in North America. However, we are not able to ship garlic, potatoes, asparagus crowns, bulbs, onion sets, Mason bee cocoons, or nematodes outside of Canada. We regret, we cannot accept returns or damages for orders outside of Canada. The minimum shipping charge to the US is $9.99.
Description
More details about Upland Cress Organic
Barbarea verna. CERTIFIED ORGANIC! Botanically different from the other cress varieties, this biennial is a bit slower growing and slower to bolt, but very easy once established. It’s a super cold-hardy addition to salads, and blends well with milder greens like chickweed. Try it in containers or right in the garden border as a go-to source for healthy greens that are packed with nutrients and flavour. This variety is known as Belle Isle Upland Cress Organic. Grow a row along with spinach, under cover in winter, and exposed in early spring and late fall. Matures in 50 days. (Open-pollinated seeds)-
- Barbarea verna
- Slower to bolt
- Cold hardy
- Matures in 50 days
- Certified Organic seeds
All About Upland Cress Organic
How to Grow Cress

Step 1: Timing
Seed every three weeks from just before the last frost date until the end of summer for a continuous harvest. Provide frost protection with a cloche or heavy row cover when frost looms in the fall. Many mesclun types and mixes will continue to grow all winter where winters are mild.
Step 2: Starting
Plant in a block or in a wide row. Sprinkle the seeds evenly over prepared, moist soil. Try to space seeds about 1cm (½”) apart. Cover lightly with soil, and firm them in. Four grams of seed will plant a 12m (40′) row that is 7cm (3″) wide, so don’t plant the whole packet at once. For container growing, choose containers that are at least 10cm (4″) deep. Wider is better. The most common mistake is over-planting.
Step 3: Growing
Moderately fertile soil – particularly if you’re planning mutliple harvests. Dig in 1 cup of complete organic fertilizer for every 3m (10′) of row. For containers, use peat or coir based mix with compost added. Water regularly. If growth slows after harvest, use a bit of kelp or fish based fertilizer to provide a boost of nutrition for the next growth spurt.
Step 4: Harvest
There are two methods of gathering salad greens. You can use scissors to cut everything about 2-5cm (1-2″) from the ground, when the plants are about 10-15cm (3-4″) tall. Or, you can pick individual leaves as they’re needed. The first cutting may contain more brassicas than lettuces (arugula, mizuna) but if you cut the mix back when the leaves are still small, the lettuce will catch up. The salad greens will regrow for a second harvest in another 2 or 3 weeks.
Tips!
Disease & Pests: Slugs love baby greens and flea beetles love brassica leaves.Additional information
| Matures | in 50 days |
|---|---|
| Season | Cool season biennial |
| Exposure | Full sun to partial shade |
| Quantity | 0.25g, 1g, 5g, 25g, 100g, 500g |
You must be logged in to post a review.


Reviews
There are no reviews yet.